So something has been bothering me about my lovely Tarantula quads.. Prop slop - the motion the blade can have without moving the drive shaft or engaging the gears of the motor.. Uggg it's friggin terrible and honestly I believe it feeds back a lot of the jello and vibration in video when flying with a cam. Even when brand new there is actually a rather large amount of it, and we all assumed it's the prop/screw interface... Well, it's not! I took a deep depth look at a VERY sloppy one on the Frankenspider and found a few things.
ONE- the screw is holding to the prop just fine, it's the hole in the drive shaft that is too big. causing a bit of motion before the screw contacts the drive shaft and feeds back as play out at the end of the prop.
TWO- the actual lower gear is also slipping a bit on the drive shaft, no where near as much, as the screw goes all the way through, but, it's movement amplifies any slop up top.
Well I fix it, (at least temporarily) so there is close to zero slop.. and what little is left is the actual gear interface. how? Very simply..
On the bottom gear I took a drop of crazy glue and dripping it right inside the drive shaft and using one of the smallest Zip ties I stuck the point in and kinda swished it around the inner area of the screw and drive shaft interface, and the little glue stuck to the tie wrap tip I ran around the outer edge on the bottom of the gear and drive shaft (obviously don't do the top because the glue can screw with the bearing and glue it if not dry and even if dry it could mess the "face" of the gear and how it sits on the bearing/bushing)
The top took a bit more brain power but is actually pretty easy once I thought about it. instead of filling the hole which I was thinking of maybe a drop of solder then filing down smooth.. I stuck the pointed end of the zip tie in the top of the shaft, added another to fill the space more and snipped then off flush. Now when I tighten up the prop screw it pushes the zip tie tips and claps everything stiff (think bicycle seat post clamp)
video of how it's done..
(note I forgot to turn on mic so just did text and added music for fun )
Just did a quick flight and watching the video it has smoothed out a LOT .. (will edit up and post later) don't get me wrong, it's still not 100% but it's defiantly better. Especially in descents where even with my anti vibe setup I'd still get heavy vibration and jello.
Now you could probably use anything inside the upper tube to fill it. Even thinking a Q-tip with some glue or something to harden it, maybe even a bit of softer epoxy (remember the screw still needs to get through) I'm sure someone will come up with a better method.. but this might get them thinking!
If Prop slop bothers you, give it a try. Honestly, you probably can't make it any worse!! LOL
Some fact and info about the FrankenSpider build - Will be adding stuff as I go..
WEIGHT -
Lots of people are asking about the weight.. well got around to doing it today..
Looks like there is about 70 Grams weight loss. Note the full Tarantula has the prop guards on where the FrankenSpider has no guards. That's a few grams right there but the build is still a decent Weight Watchers Approved savings!
FLIGHT TIME -
OK, today I got just over 8 minutes flight time. Now this may not seem great but, the thing is built with older motors and bearings which have had MANY flights and crashes. Also the Batteries I have are getting old and have a rather large number of flights/recharges on them.
Also carrying the RunCam HD.
Note the same setup right now (cam, battery and such) I'm only getting a little over 5 minute with my completely stock Tarantula..(which is just as worn out) so the 8 minutes is rather good!
I'm guessing with New motors, bearings, gears and a newer battery I'd say well over 10 minutes and likely up to 12 is possible!
(a crashed Tarantula X6 revived with a WLToys v262 frame)
So as many of you may know (and have probably discovered yourselves) I've been trying to get Tarantula bodies for my quadcopter. But seem to always come broken because none of the retailer will ship them in proper packaging to protect it well. So basically I gave up on stock Tarantula body and decided to try a WLToys frame from a V262/666 quadcopter to see if I could cheaply build one with the Tarantula's electronics. I am 95% successful. There are a few tweaks that I want to adjust, but I have the major stuff figured out and she flies very reliably. I now have torn it back down as I want to straighten out a few things from the original build being rushed and kinda an learning experience. I am going to paint the body and document the reassembly as best I can as I have gotten a butt load of requests for information on what is needed, how to go about it, and any issues or tricks I learned during the build.
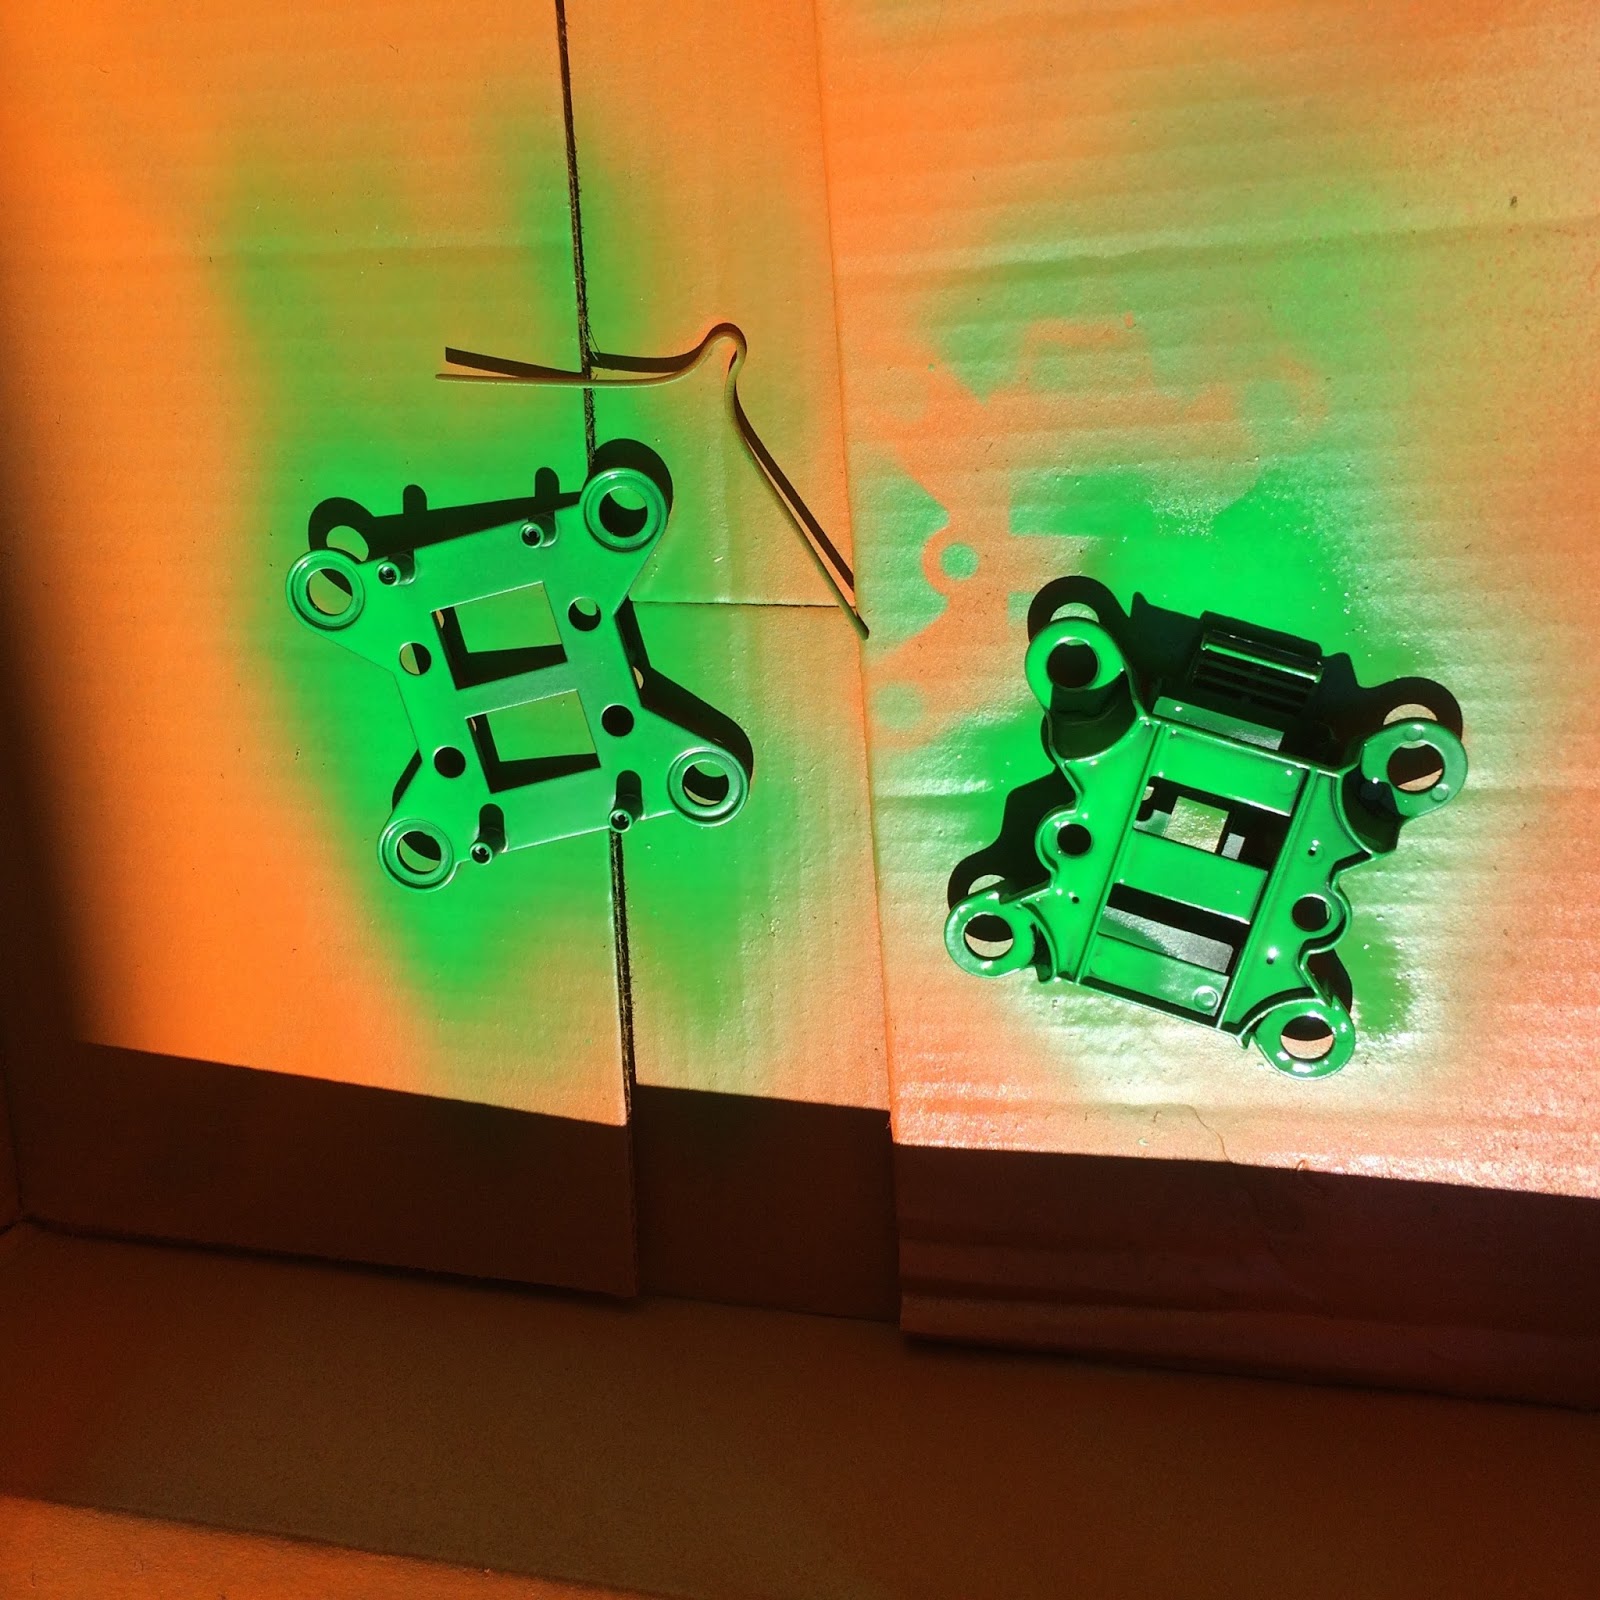
OK, the paint -I shot the frame this morning with the Orange and think I'm going to hit the front or back with a day-glo green for a little assistance with visual orientation as it's VERY hard to see it in black with it being so thin and small.
OHH Orange!!
Orange and green clash nicely!!
Now let's get into the build...
1st off -
The Parts I'm using here are as much from the Tarantula as I can, well, because I have them. All electronics are off the Tarantula as well as the motor mounts, gears, motors and props and even 90% of the screws.
The WLToys V262/V666 parts are listed...
one body (WLtoys V262 V333 V666 RC Quadcopter Spare Parts Main Frame)
one battery box (Spare V666 - 03 Battery Box Fitting for Wltoys V666 RC Quadcopter)
Really that's all you need. I did add the anti vibe camera mount as I want to carry my RunCam HD on it.
Anti Vibration Camera Mount (Spare Anti - Vibration AB Fitting for Wltoys V666 RC Quadcopter)
Anti Vibe Balloons (Damping Ball Fitting for Wltoys V666 RC Quadcopter)
It seems now you can purchase it as a whole anti vibe/camera mount unit but when I ordered they only came separate. Also the little screws and washers for the separation prevention safety were just stuff I had laying around as they didn't come with it.
Assembly of the frame is pretty straight forward. Slide the arms in the body, make sure they are seated then slide the motor mounts over the ends of the arms. The Tarantula motor mounts slide over the V262 carbon arms snuggly, down right perfect, almost like they were made to be used that way.. (hummmm, shared mold maybe? ;) )
(Click images to enlarge)
Some minor issue, the carbon arms I used have no holes or anything drilled in them and the Tarantula's motor mounts are held by the body halves studs screwed together holding it, nothing is actually screwed to the mount it's self, it's just pinched between the Tarantula shell.
For the body to arm mounting, the screws thread into the body so I just used some square point screws (no actual point to make a hole and crack the carbon) and pinched it lightly. worked awesome. For the arms to X6's motor mounts attachment I drilled a very small hole in each arm right where the stud in the Tarantula's body went through. screwed a small screw in that fit just inside the stud hole in the mount. Simply, it prevents the mount from sliding off the arm. I put a few drops of crazy glue in and around the hole to help prevent the carbon from cracking. (works great as the whole motor mount broke during a major crash last night so it's sure not coming off)
(Click images to enlarge)
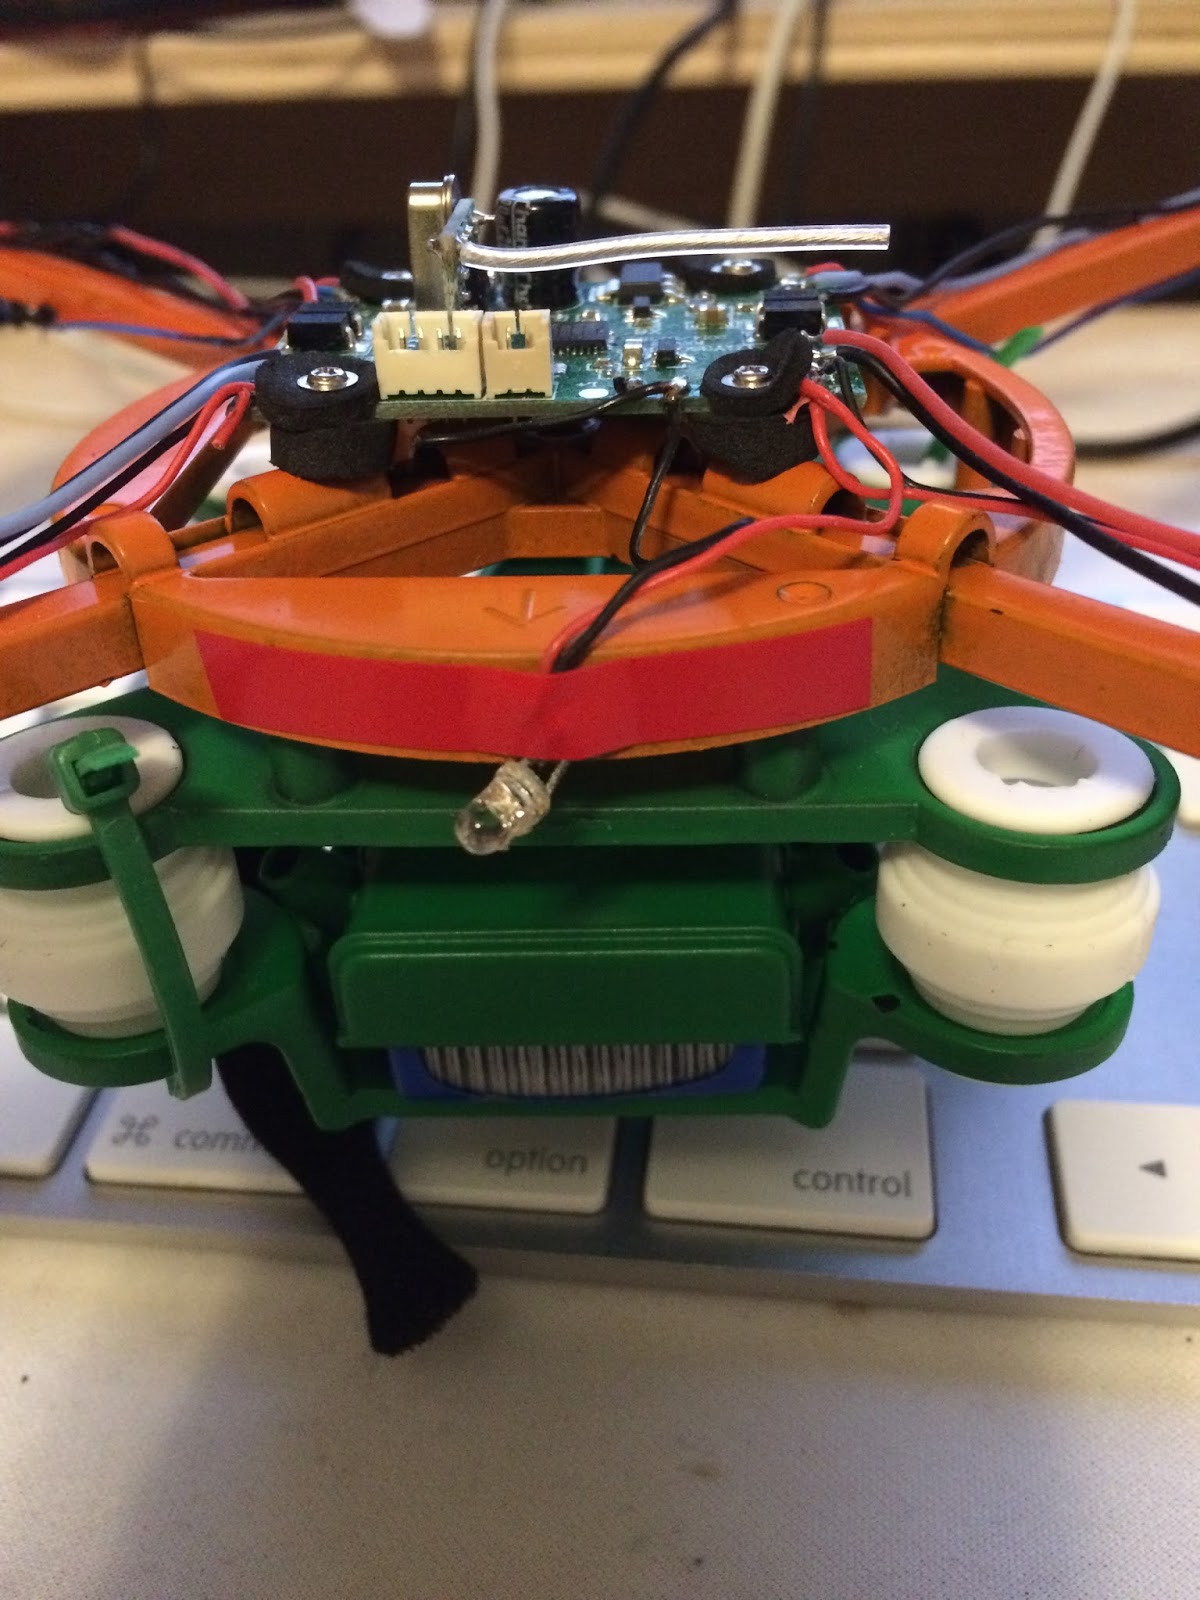
The battery box is just screwed to the under side of the frame where there are 4 studs. If using the camera anti vibration mount the battery box screws to it. The battery adds weight to the dampening system as the camera it's self aren't usually enough weight to activate the balloons.
Electronics are also pretty easy to get setup with one exception (which is kinda a major one) the Flight Control Board.
I was REALLY careful with orientation of all the wiring so I wouldn't get the thing flying sideways or have issues with LED's or the battery cable. I detached everything from the Tarantula but left it all in the shell so as not to turn anything around or get something upside down. I mounted up the motors, gears and props on the new frame more so I could flip it over and not worry about the FC board getting squished. The amount they get in the way is minimal and the protection of the top of the FC board is worth the little annoyance. When it was time to install the FC and wiring I just put them side by side, picked it up out of the Tarantula body and plopped it on the V262 frame.
Only issue I had as I have stated earlier was with the FC board and the mounting studs on the V262 frame are just slightly off. As you can see the screws will actually go through and in, but they are in contact with the edge of the FC Board. I tried it that way and it flew but after a minute of so she'd start to pitch off and need trimming and it would get gradually worse. (almost exactly the same issues reported with bad version #2 FC boards.. wondering if there is an easy fix there?)
Screws are just off the holes in the FC Board
So, I ended up cutting out a small bit of the FC board and used the stock Tarantula board dampeners. I put the fat dampener doughnuts under and the thinner ones on top then used the stock Tarantula screw which have the tiny washer built into the head, I screwed it all down, but not too tight. Holds and flies perfectly. There is a small area the doughnut over laps one of the LED spots on the board but it hasn't cause an issue yet.
Board after knocking out for mounting studs and after dampeners and screws installed
Lastly, I just used a thin piece of electrical tape to hold the wires in place out on the arms. I removed the LED that is normally at the top of the Tarantula and one of the eye ball LED's broke off during mounting and such so I just snipped it's wires and left only one up front which is also held in place with a simple strip of electrical tape to the front of the body. I might drill a small hole in the body there to slip it through later to get a cleaner look, but for now it actually works well.
Lastly are the legs, which I recorded a little video of how I made them. Here's the simple zip tie leg install method I used.
The legs actually work really well and even better than I thought as I had a major crash which broke the motor mount right off the quad. Leg held the mount to the body somewhat and prevented the motor cable from being totally yanked and from the whole chunk being lost.
After crash broken motor mount which leg held from flying away
That's basically it!! transferring the X6 over to a V262 frame really isn't all that hard and MAN the thing is quieter, faster and smoother flying. The best part is I have taken a pretty much destroyed Tarantula and made it totally flyable again with a rather small investment of money and time.